
Setup Up Environment
- From the main juypterhub screen (right after logging in and before opening any notebooks)
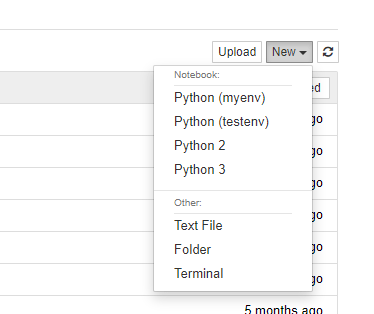
- Click the “New” pulldown button and choose “Terminal”
- Create a new environment (see the cheatsheet). Lets call the environment name myenv (you can give it any name you want)
> conda create –name myenv python=3.6 (note: its 2 dashes)
- Try activating the environment by typing
> conda activate myenv
- With this environment activated, you can install any package you want using “conda install PACKAGENAME“, or if a particular version is needed “conda install PACKAGENAME=versionnumber”
- Using pip “pip install PACKAGENAME –user”
Add Environment to Jupyterhub
- So now your environment is created. To make it appear in Jupyterhub, type in the terminal window the following
> python -m ipykernel install –user –name myenv –display-name “Python (myenv)” (note: its 2 dashes before “user”, “name” and “display-name”)
- Then, when you next start a session in jupyterhub, you can open the session in your new environment and use/install/remove/manage any package you want without administrator access!