DGS/CGS User Guide
- Access the TerpEngage system using the link provided:(https://umd.lightning.force.com/)
- Log in with CAS to access the system using your University of Maryland directory ID and password.
- When you have accessed the system the first screen to appear is the Enrollment Rx home screen within TerpEngage.
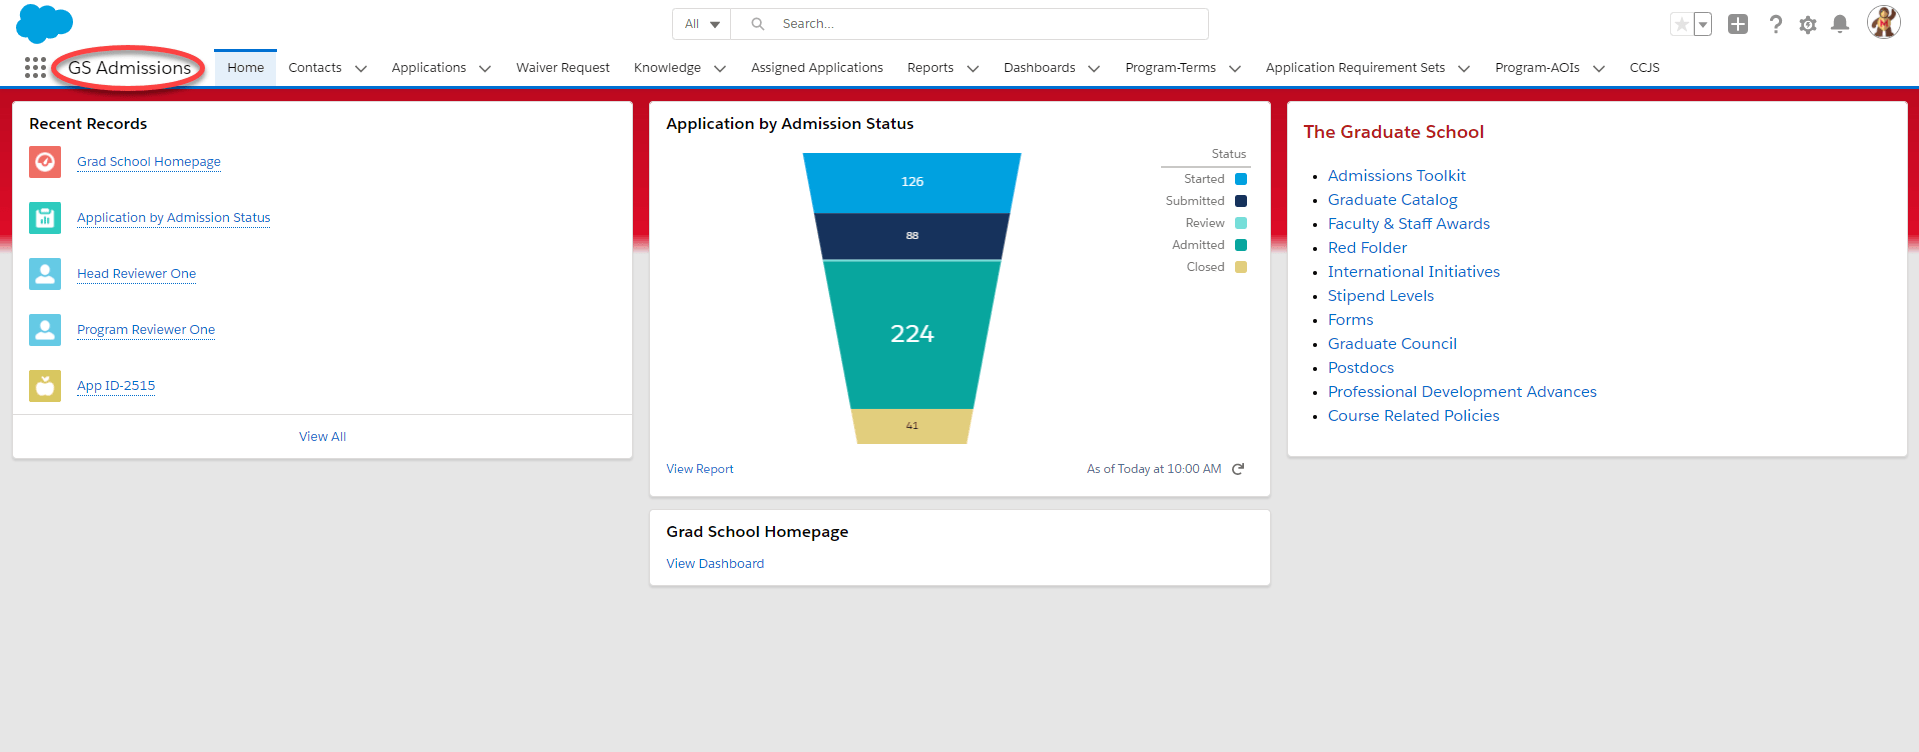
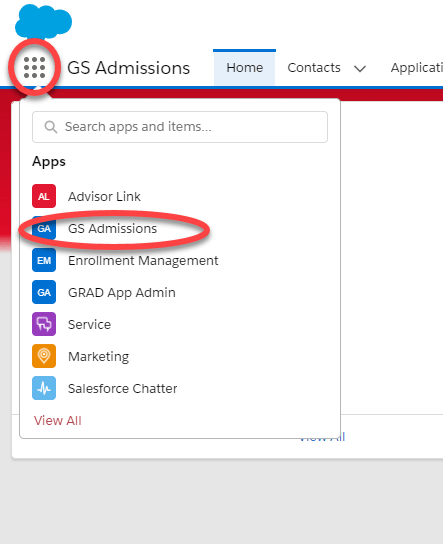
- Confirm that you are in the correct application by looking at the upper left corner, which should read GS admissions (figure 1). If you do not see GS admissions click on the 9 dot app launcher and select GS admissions or type GS admissions in the search bar (figure 2).
Home Screen Layout
- There are three panels on the home screen: Recent Records, Application by Admission Status, and links to useful Graduate School pages that can be used as a reference. Any records recently viewed including applications and profiles will appear under your Recent Records.
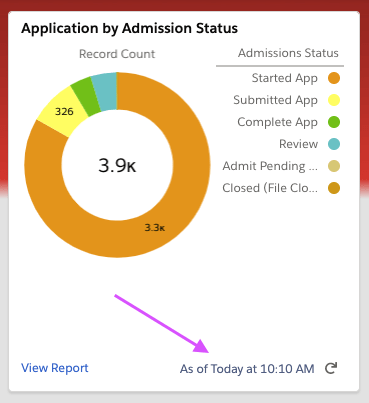
- The chart in the middle of the home page will show a basic summary of admissions data. You can view started applications, submitted applications, complete applications, inquiries, etc. Click the refresh icon at the bottom right for the most up to date records.(Figure 4) Please note that this chart will be updated over time to display different data. Currently the admissions reports in the middle panel are not tied to a term.
- The tabs above the three panels are used to access data within TerpEngage (Figure 5)
Tabs Quick Overview
- Home
- Contacts: Used to lookup student-specific information
- Applications: View application details on the backend
- Waiver Request: Used to request waiver codes that can be given to applicants.
- Assigned applications: Review applications in your program’s Review Queues
- Reports: Generate standard reports from your program’s data
- Dashboards:
- Program-Terms: Used to look up what active terms are currently in the system
- Application Requirement sets: Program-specific application requirements in the system
- Program AOI’s: Used to look up what Areas of Interest are currently in the system
Waiver Request
- All waivers are for the current admission cycle (July 1 to June 30) – Fiscal Year.
- Waiver codes are tied directly to each program code and are single-use.
- Request only the number of waivers needed.
- Please only use a KFS number that is assigned to the selected program.
- Send each code to only one applicant.
- The waiver will be applied to the payment page of the application.
Follow these steps to generate waiver codes:
Step 1: Enter the name if you are the CGS/DGS requesting the fee waiver
Step 2: Provide the College/School and the program to which the waiver is associated.
Step 3: Enter the number of waivers you would like to generate.
Step 4: Provide the program’s KFS ID (for internal billing purposes)
Step 5: Enter the start and end dates for which the code will remain valid (Please note that codes are valid for the current admission cycle and must not surpass the Fiscal year)
Step 6: Click submit to generate the waiver codes.
Once you submit a request, the codes will generate, and the number of waivers you request will appear. You will receive an email with a link after a request is submitted. The link will allow you to view all waiver requests submitted, as well as which applicants used the waiver code provided. Please instruct applicants to input the waiver code before they submit their application.
The requester can then immediately see the list of waiver codes generated and record them for future use. When the program wishes to waive the application fee for a specific applicant, they can send one of these Single-Use waiver codes to the applicant. The applicant can then use the code in the payment section of the application.
Additionally, the Graduate School has three other waiver types. These waiver types will be processed by the Graduate School.
- Previous student waiver
- Program-degree waiver-multi use
- Preparatory program fee waivers
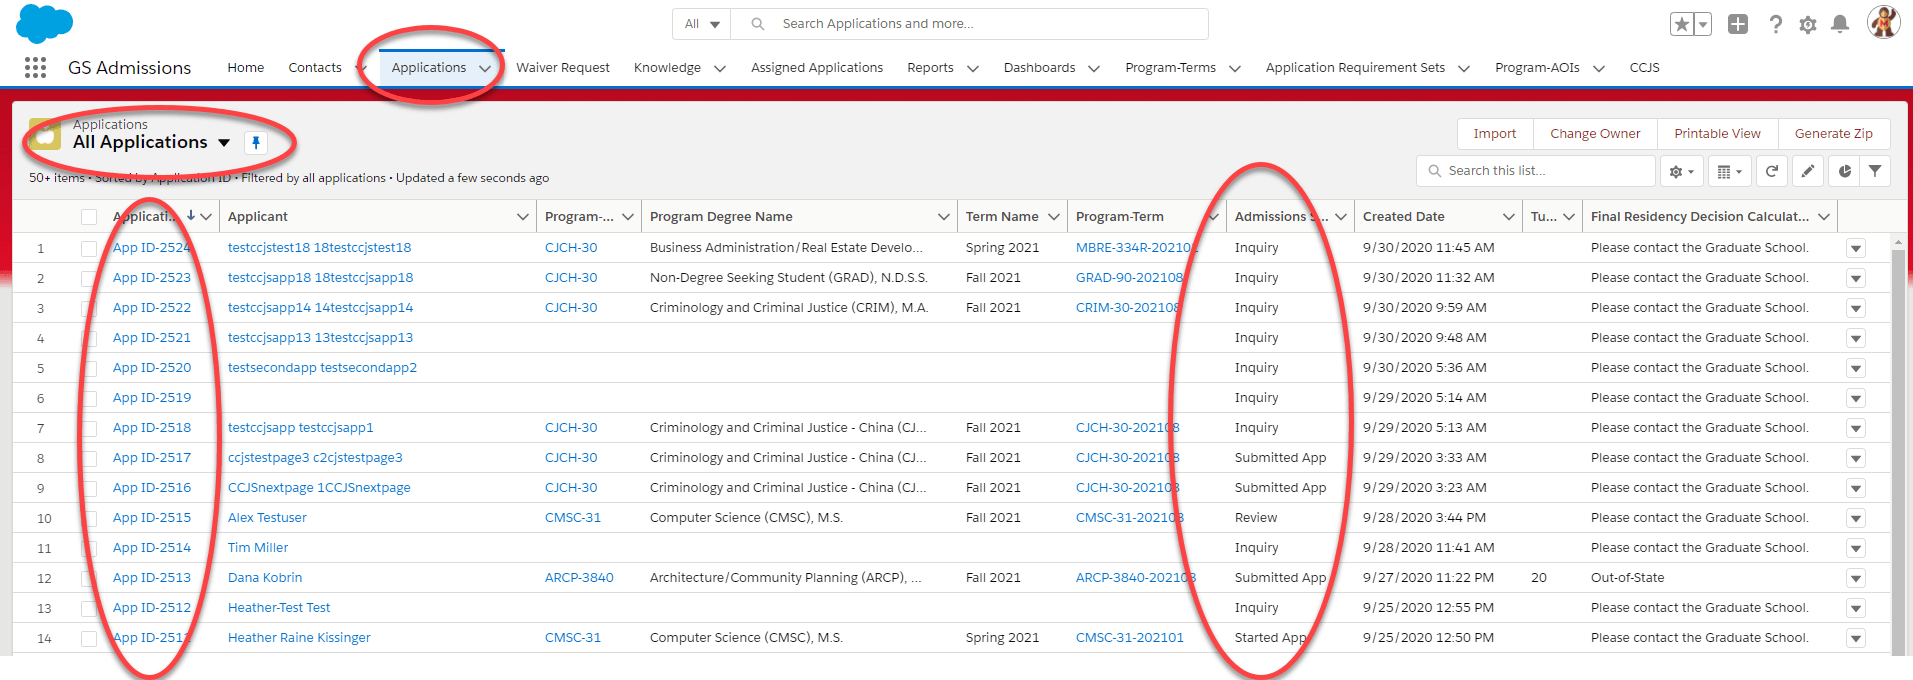
Applications
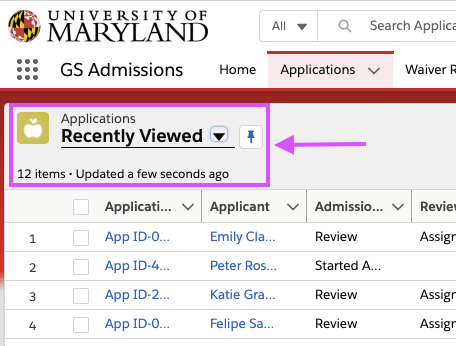
- When you click on the Applications tab, the system will show your recently viewed application records as a default. In order to view all Applications, click the drop-down arrow and then select All Applications. You can change the default list view by clicking the pin icon.
- Select an application by clicking the App ID to the left or type in the program code in the search list in the upper right.
Admission status definitions
- Inquiry: Applicant created login however, they have not started working on the application.
- Started App: Applicant has started an application, but has not submitted it.
- Submitted App: Applicant submitted the application. The application is ready for program review
- Completed App: All required documents have been submitted.
- Admit Pending Enrollment: The applicant has been admitted by the Graduate School, but has not enrolled.
- Review: The application is currently being reviewed.
- Closed (file closed): The applicant was rejected or withdrew their application.
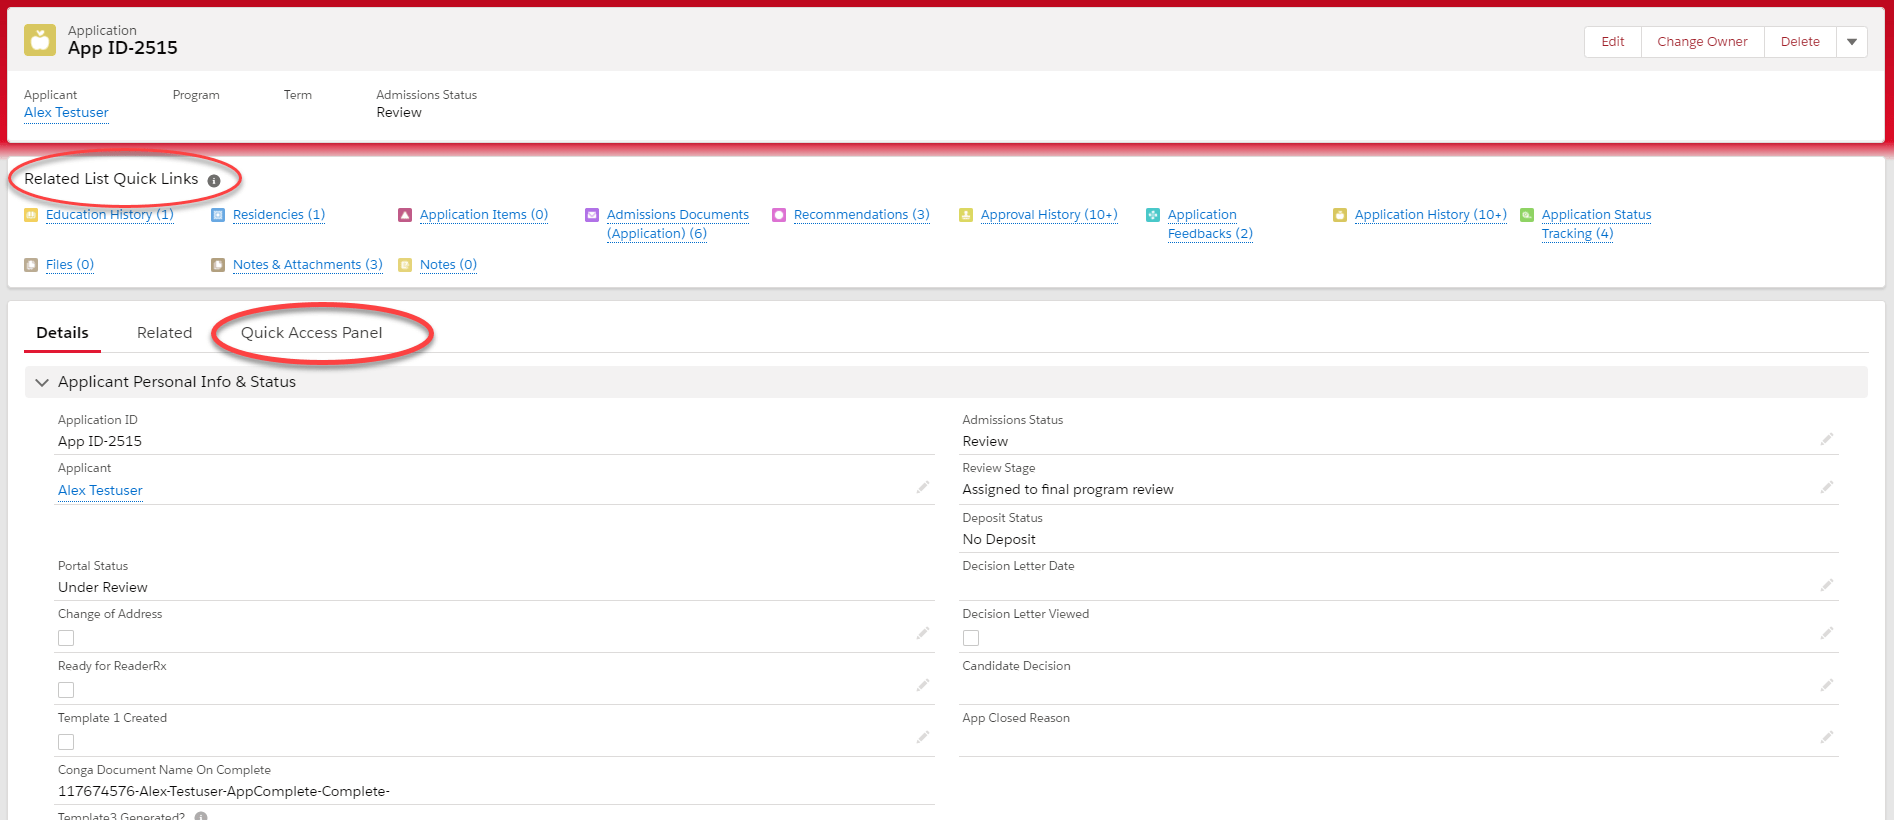
View and Upload Documents
- There are two ways to view application information and attachments. There is the related list section titled Related
List Quick Links to view Education History, Admissions Documents, Recommendations, Application Feedback, and Application Items (Faculty of Interest) and files.
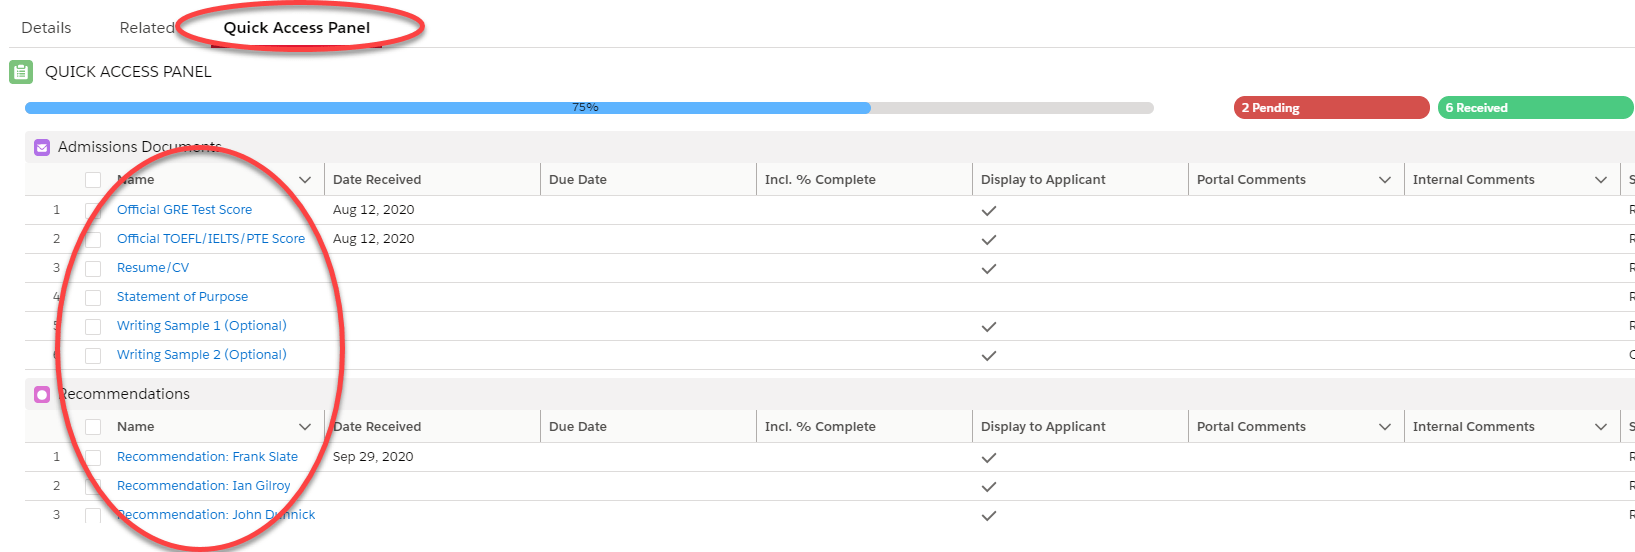
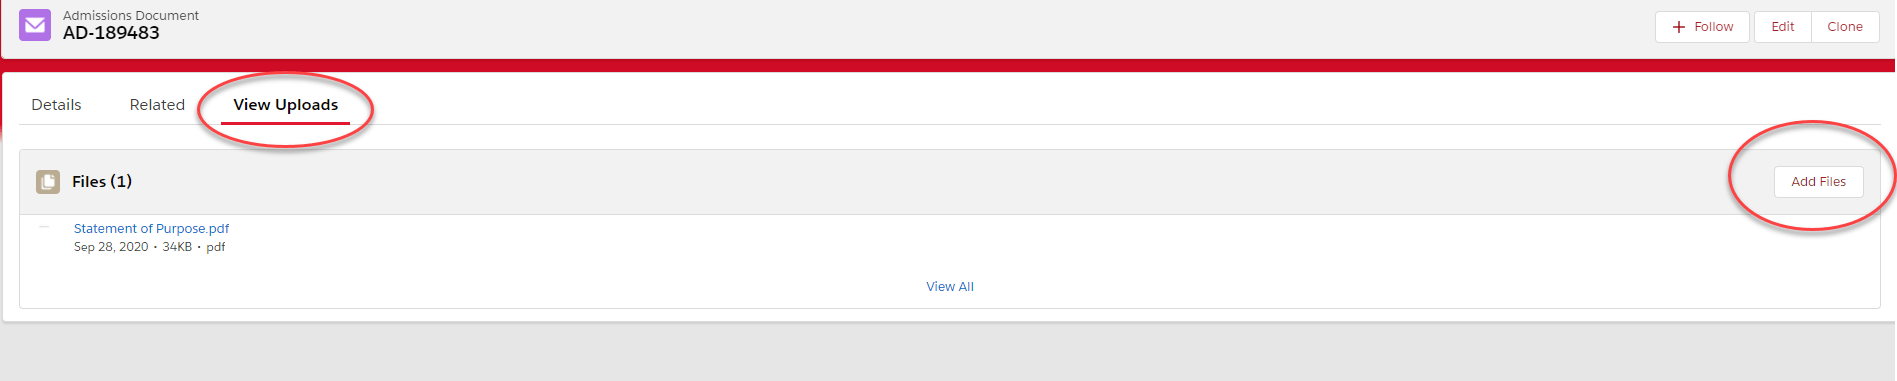
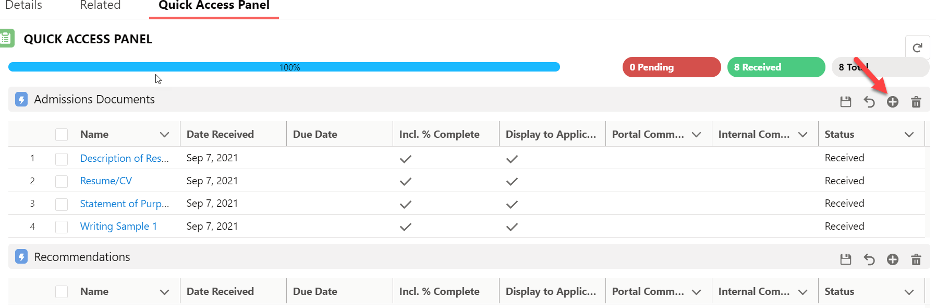
- Under the Quick Access Panel (figure 9), you may view the required application documents found in the Related Links on one screen. To view this information, click the Quick Access Panel located next to the Related Tab. Under the name column, click the blue link for the document you would like to view or upload.
Step 1: Click the blue link under the Document name column to select which document type you want to add (figure 9).
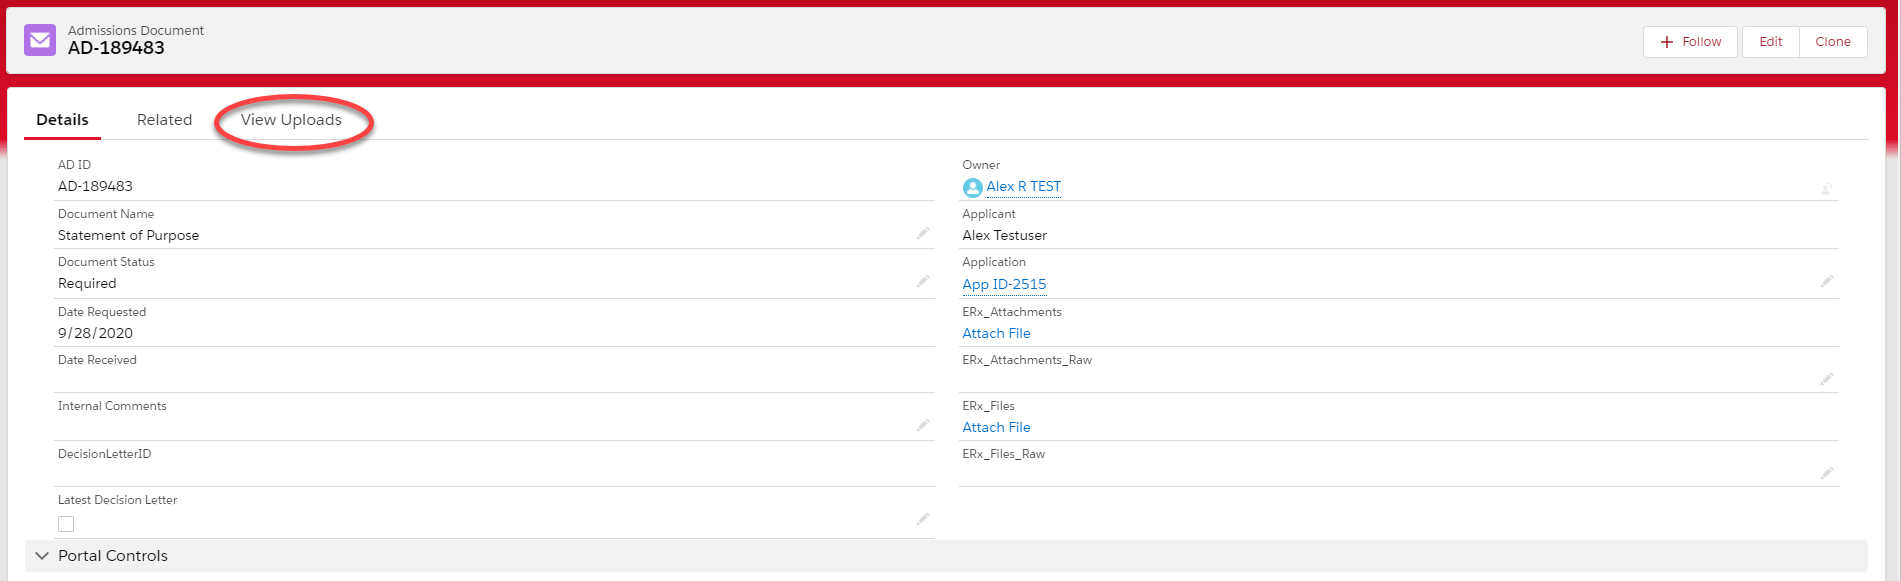
Step 2: Click the View Uploads tab. (figure 10)
Step 3: Click the Add Files button on the far right of the screen. (figure 10)
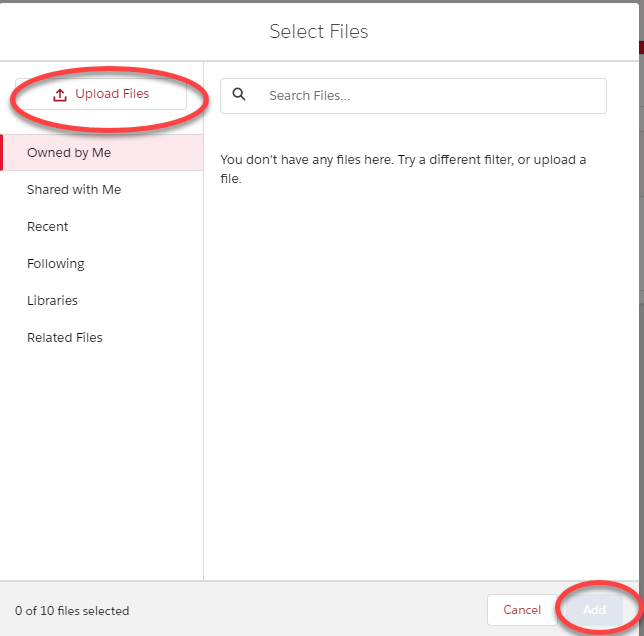
Step 4: Click Upload Files and select a file to upload. (figure 11)
Step 5: Select the file and click add in the bottom right corner. (figure 11)
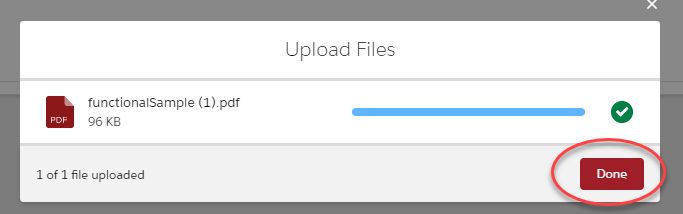
Step 6: Click Done to upload the file.
- Please note that as a DGS/CGS you only have the ability to upload files. You may not delete files from an application.
|
Upload Justification Letters
If documents are required in addition to the program requirements, they can be added to the admissions documents. If an applicant requires a justification letter for example, it can be added from the quick access panel.
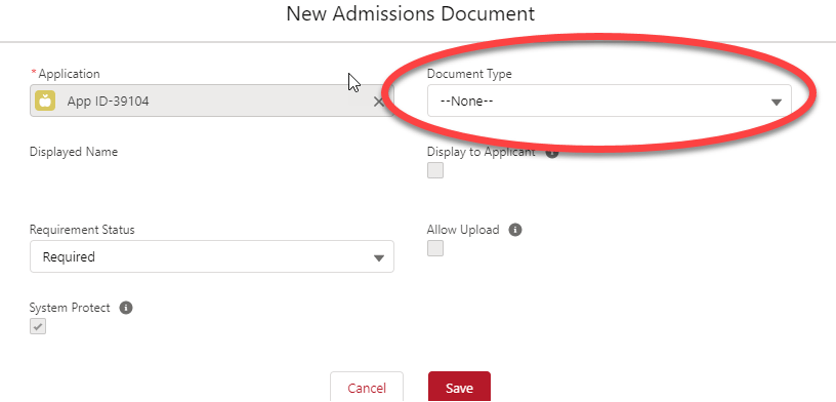
Step 1: Click on the plus symbol to add a new document.
 Step 2: Under document type scroll down and select “Department Justification Letter” from the picklist to add a justification letter. Step 2: Under document type scroll down and select “Department Justification Letter” from the picklist to add a justification letter.
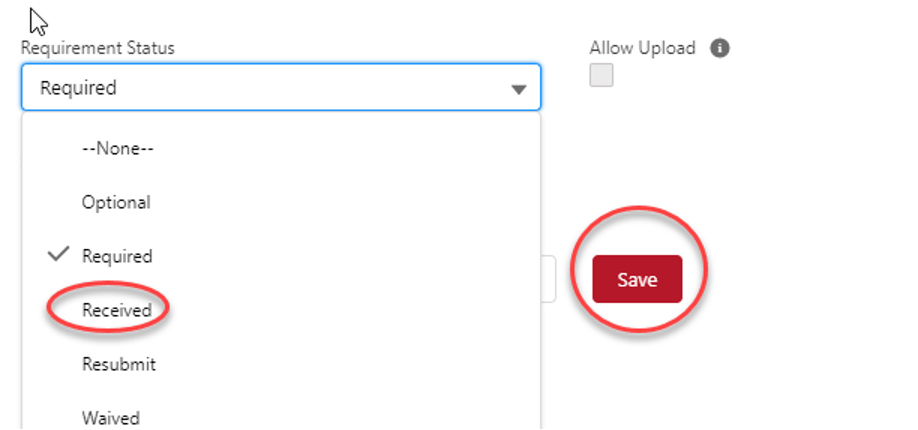
 Step 3: Next, change the requirement status to “Received” and click Save. Step 3: Next, change the requirement status to “Received” and click Save.
Step 4: Navigate back to the Quick Access Panel and click “Upload Files” to upload the justification letter.
|
Contacts
- From the Contacts tab, you can view information about applicants such as full name, email address, UID, mailing address, phone number, email address. At the top of the Contact’s page, you can view all of an applicant’s related information. Information includes applications they have submitted to your program, Official Education History (data from the mainframe), and Education History (uploaded by the applicant), and Test Scores.
- The rest of the applicant’s information will reside in the Applications Tab, which contains the rest of the data they have entered in their application.
Program-Terms, Application Requirements Sets, & Program-AOIs
- The last three tabs on your homepage are used as a reference.
- The Program-Terms tab is used to look up what active terms are currently in the system.
- Search for your program by entering the program code in the list view search bar and pressing the Enter key. Once you have selected the program, you can view the current active terms for your program. From this screen, if you select the Program Term name on the far left, you are able to view the domestic and international deadlines for the program as well as any applications that have started or submitted in that term.
- Application Requirements Sets will populate a similar list of your program requirements. Use the same search bar on the right to search a program code; once you click on a program, select the related tab in the upper left corner to view required documents for your program. This list will display all the required documents an applicant must submit for your program.
- To view Program Areas of Interests, type in your program code to view the AOIs currently listed for your program.
|