While part of Maryland got some rain this week, the past two weeks have been hot and dry so that you might see symptoms of heat stress on plants.
Heat stress occurs when plants are exposed to enormous amounts of sunlight and heat for an extended period of time. The ideal range for most crops is between 68 and 86 degrees Fahrenheit (20 and 30°C). Temperatures outside this range, whether in the air or the soil, during the day or the night, are harmful to plants. The term “heat stress” often refers to a period in which plants are subjected to high temperatures long enough to alter their ability to function or grow normally.
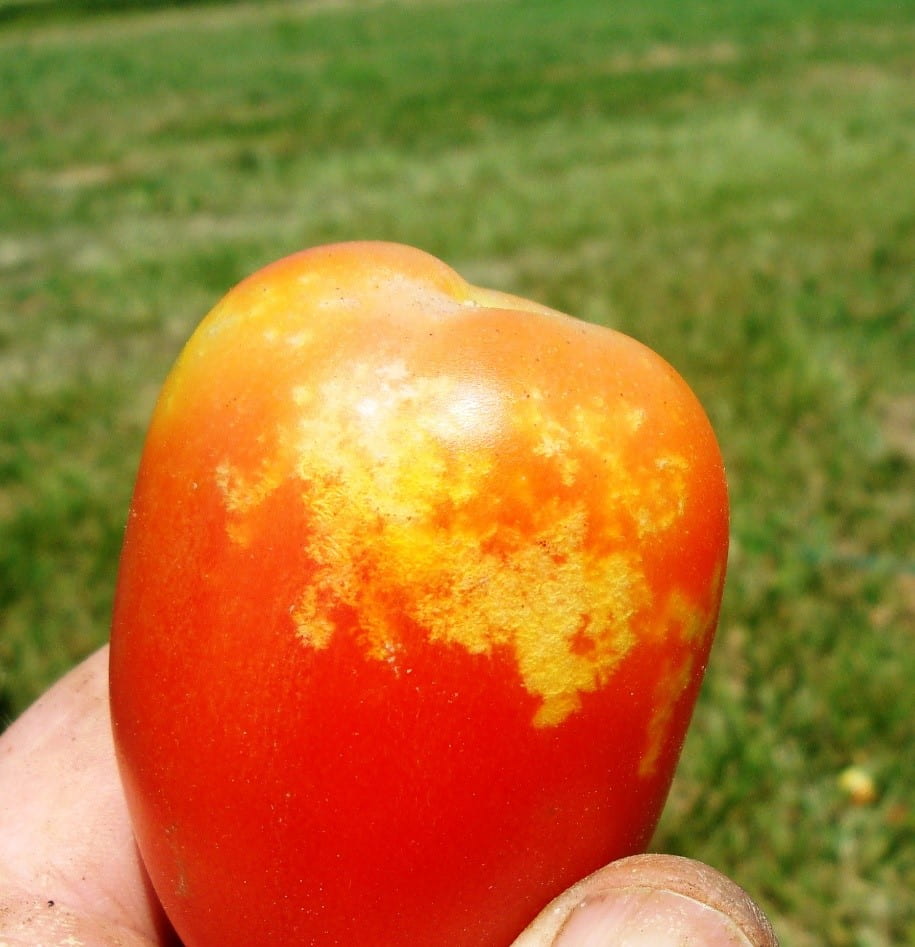
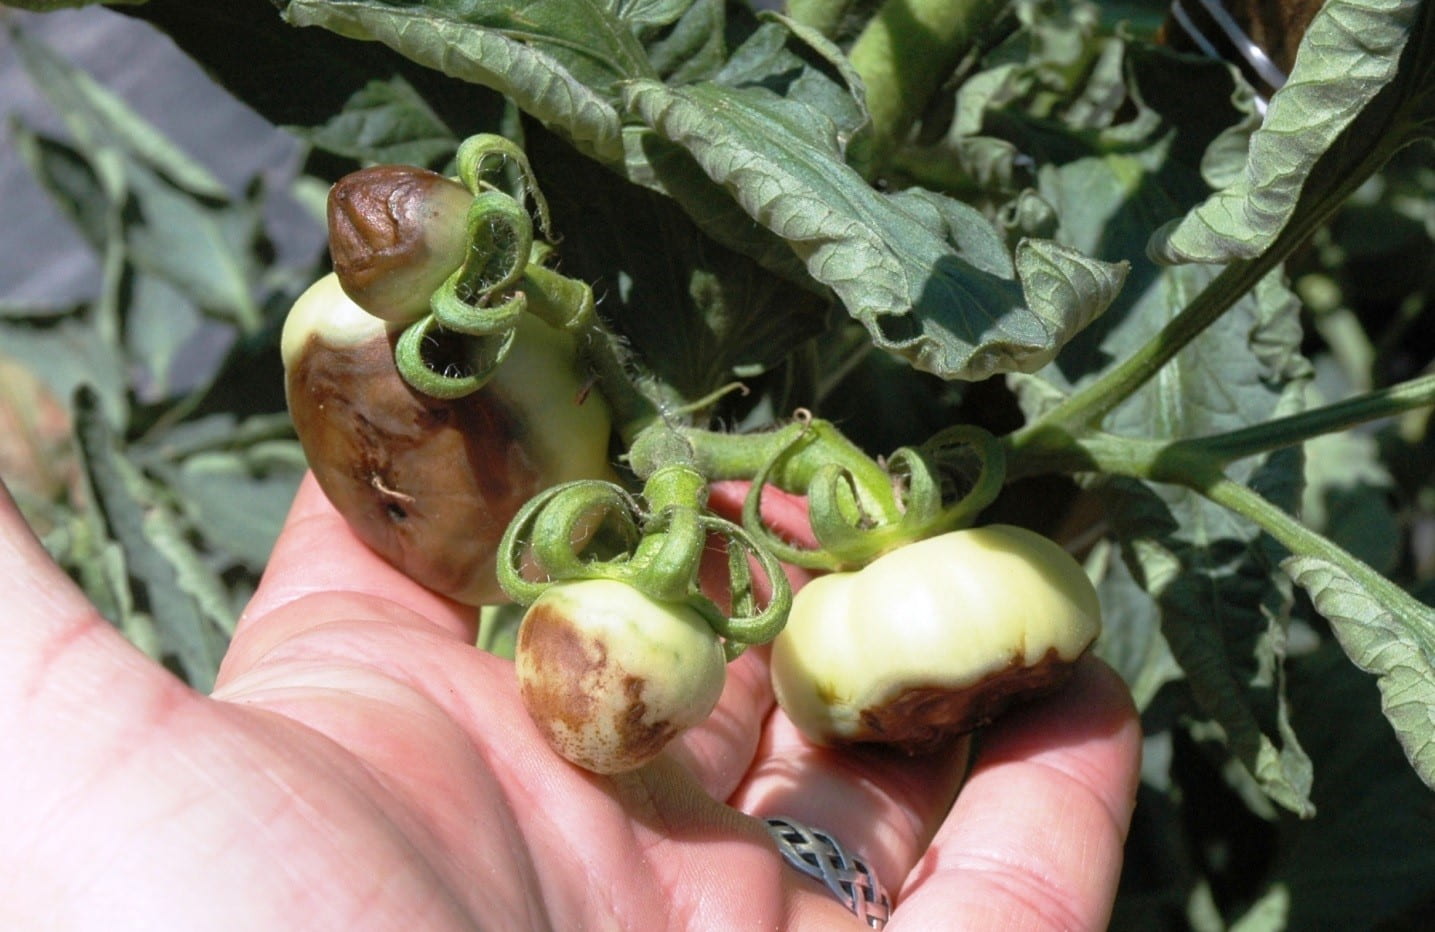
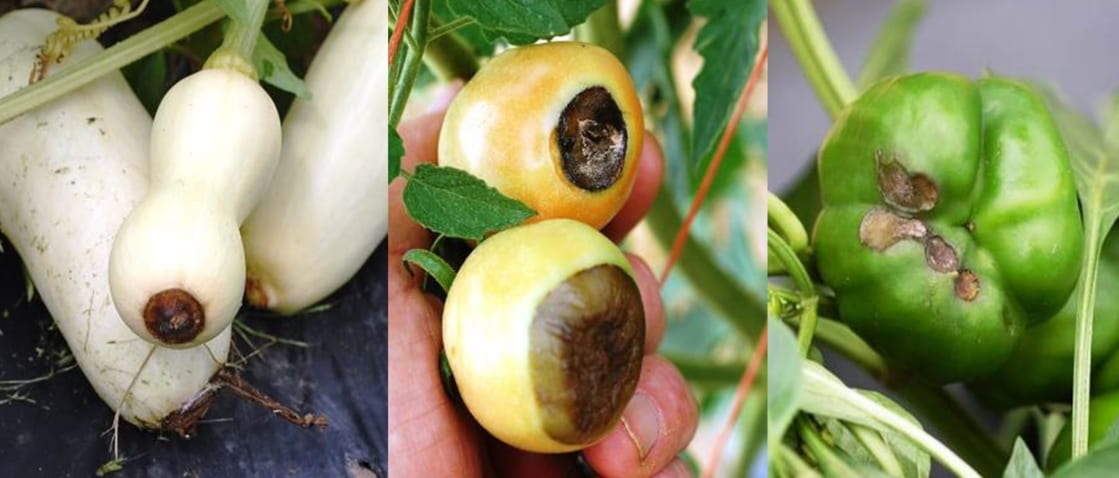
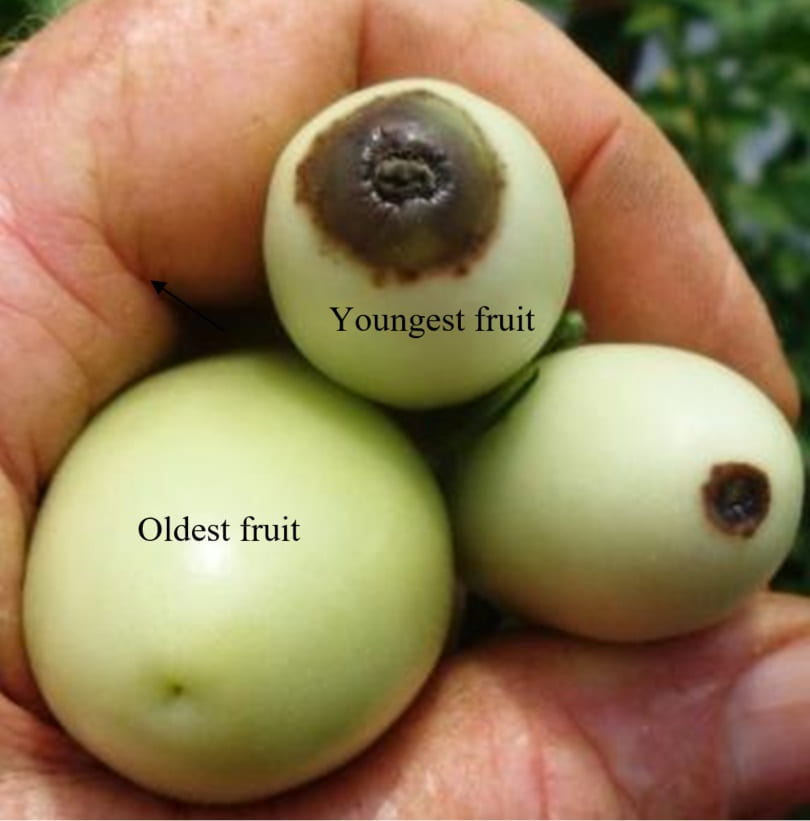
Heat stress disrupts various plant processes, such as inhibiting the growth and development of plant tissue, reducing the photosynthesis rate and nutrient uptake, reducing pollen production, causing flower and fruit drop, and causing sunscald on fruit. Shallowly rooted and young plants will be the most impacted by heat and drought.
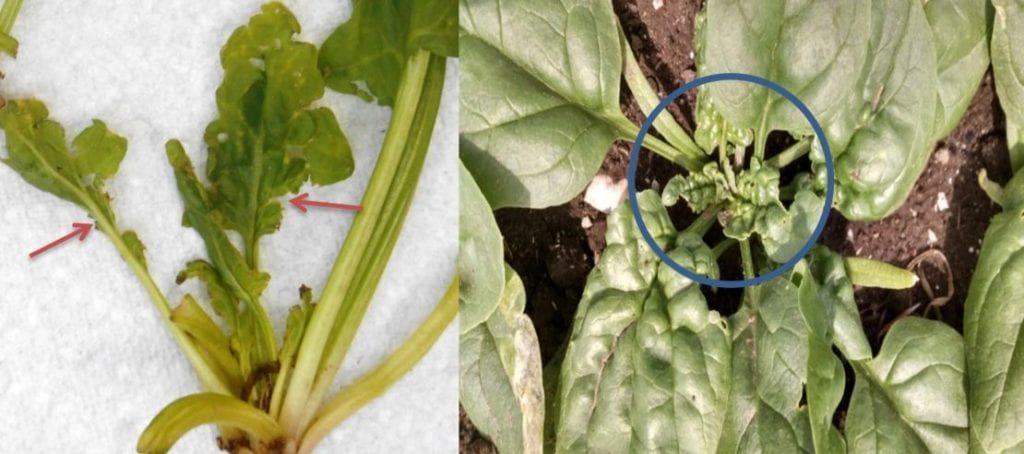
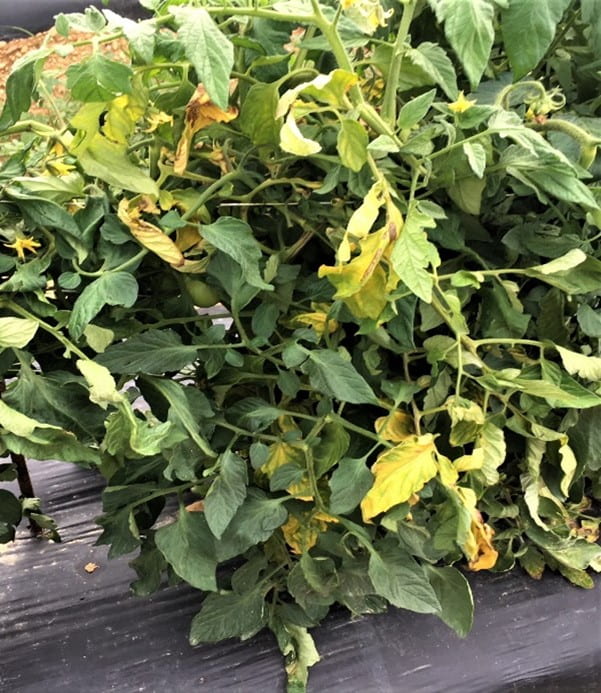
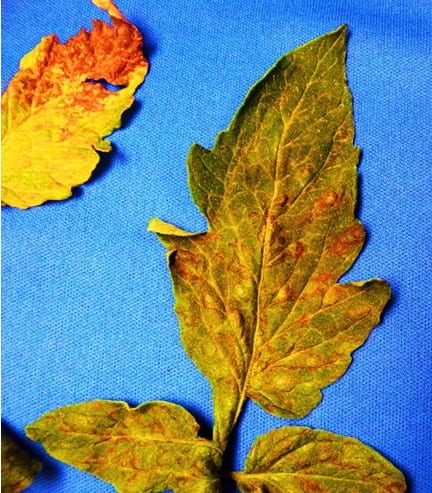
Common visual signs of heat injury in plants include the following: leaf rolling and cupping, leaf drop, scalding and scorching of leaves and stems, rapid leaf death, reduction in growth, and lower yields. Wilting is the primary sign of water loss, which can lead to heat damage.

Photo by Howard F. Schwartz, Colorado State University, Bugwood.org
High temperatures can also cause increased sunburn and other developmental disorders in fruits and vegetables. High nighttime temperatures decrease pollen production, reducing fruit sets and smaller fruit. Flower abortion can happen at temperatures ranging from 75° F to 95° F, depending on the crop.
Some vining vegetables in the cucurbit family (pumpkins, squash, melons, cucumbers, and the like) will develop more male flowers than female flowers in high temperatures (over 90° F during the day and 70° F at night).
REDUCING PLANT HEAT STRESS
- A great way to reduce heat stress on plants is by meeting their water need. Plants keep cool through the evaporation of water from their leaves. If a plant lacks water, it will close the pores in its leaves (stomates), preventing evaporation to avoid wilting. When stomates close, the plant can no longer keep itself cool and leaves heat up, causing stress. Morning watering is often prescribed in times of high heat.
- Using overhead watering, sprinkling, and misting can provide humidity, which we typically avoid to decrease plant disease; however, in prolonged high temperatures, the benefit of a humid environment probably outweighs the risk of plant disease.
- By adding compost to your soil, you can increase its organic matter and, in turn, its water-holding capacity.
- Mulches can also help reduce heat stress by increasing the reflection and dissipation of radiative heat. Reflective mulches like straw and wood chips can reduce surface radiation and conserve moisture. Black plastic mulch is excellent for heating the soil in the spring to allow for early plant growth. However, its surface temperature can exceed 130°F on a hot sunny day, resulting in injury or desiccation of most plant parts (root, stem, leaves, and fruits) in direct contact with the mulch. White or metalized plastic can be used for summer crops that are more at risk of heat damage. However, these plastic mules tend to be more costly. An alternative to white and metallic mulches could be to make a foliar application of kaolin clay. The white coating of kaolin clay would serve as a reflective layer on the black mulch and plant canopy to minimize temperature changes. A study conducted at the Eastern Shore Agricultural Research and Extension Center in Painter, Virginia, found that 20 to 40 lb/A of kaolin clay could maintain 10⁰F cooler soil temperatures compared to black plastic.
- Shade cloth has been shown to significantly benefit heat-sensitive crops if applied correctly by reducing the soil and air temperatures around them. Shade cloth can be placed over crops, using stakes or hoops as support; it can be particularly beneficial to sun-sensitive crops such as peppers and tomatoes. Research at UDel by Dr. Emmalea Ernest found that a 30% shade cloth provides adequate cooling without blocking too much light for most vegetables.
- Avoid applying fertilizers and pesticides when temperatures are consistently above 80°F, as they can burn crops. Check the product’s label for specifics before applying.