Welcome to The Hungry Terrapin! Here, you can browse a diverse selection of healthy (most of the time), delicious (all of the time) recipes brought to you by contributing Graduate School staff here at the University of Maryland. Our graduate community is comprised of various backgrounds and cultures, and we know we share at least one thing in common – a love for good food. Whether you’re looking for an efficient meal prep strategy or a fun dessert recipe, The Hungry Terrapin is here to help your week taste a little bit better. Please feel free to contact us if you have suggestions or comments!
Orange Chicken Makeover
Sweet, spicy (or not) and flavorful – this makeover Asian Orange Chicken is a lighter and healthier alternative to the popular Chinese fast food take-out dish and it’s quick and easy to make! This recipe came from SkinnyTaste and it was tested by Amanda! This has become a favorite for her, particularly as we are trapped inside!
*image source
INGREDIENTS
For the Orange Sauce:
- 1/3 cup freshly-squeezed orange juice
- 1/4 cup reduced sodium chicken broth
- 2 tbsp soy sauce, Tamari for gluten-free
- 2 tbsp raw sugar
- 1 tbsp Chinese rice wine
- 1 tbsp sriracha, or more to taste
- 1 tbsp rice vinegar
- 1/4 teaspoon white pepper
- 2 teaspoons corn starch
For the chicken:
- 20 oz skinless, boneless chicken breast, cut into small cubes
- kosher salt, to taste
- 1 1/2 tbsp corn starch
- 1 tbsp sesame oil
- 4 cloves minced garlic
- 1- inch grated ginger
- 1 teaspoon grated orange zest
- 2 tbsp chopped scallions
- 1/2 tsp sesame seeds, for garnish
Instructions:
- Mix the orange sauce ingredients and set aside. Amanda strongly recommends double or tripling the orange sauce because it is amazing!
- Season the chicken lightly with salt and coat evenly with corn starch, set aside.
- Heat a wok or fry pan on high heat, add 1 teaspoon of sesame oil and add half of the chicken. If you don’t have sesame oil, that is ok! Just use a neutral oil like vegetable oil. Cook 2 to 3 minutes on each side until well browned, set aside.
- Add 1 teaspoon of oil and chicken and repeat cooking 2 to 3 minutes on each side. Set aside with the rest of the chicken.
- Add remaining teaspoon of oil and quickly stir-fry the minced garlic and ginger until fragrant, about 1 minute. Want to add veggies to this dish? See note below.
- Add the orange zest then return the chicken to the pan.
- Quickly stir the chicken then add the orange sauce and cook until the sauce thickens, about 1 to 2 minutes.
- Divide between 4 plates and garnish with the scallion and sesame seeds.
VEGGIE NOTE: Do you like veggies? Add any stir fry veggies to your dish. It is recommended to fry up the veggies after the chicken has been cooked. Remove the chicken from the wok or fry pan and stir fry your veggies using sesame oil or a neutral oil. Add the chicken back to the fry pan with veggies and add in your orange sauce!
Baked Gnocchi with Broccoli
Thank you to Simone for introducing us to this delicious-looking recipe from The Modern Proper! I cannot wait to try it 🙂
*Image source
Ingredients:
- 1 lb Pre-made gnocchi
- 3 cups Broccoli, florets roughly chopped
- 1 cup Stock (vegetable or chicken)
- 4 oz Cream cheese
- 2 cups Mozzarella cheese, shredded
- 1 tsp Red pepper flakes (optional)
Instructions:
- Preheat oven to 400° F.
- Bring a large pot of salted ** water to a rapid boil. Add the gnocchi and broccoli and simmer for 3 minutes. Drain water and set aside.
- In a large oven proof skillet, bring the broth to a simmer. Add cream cheese, stirring until it’s mostly combined. Don’t worry if there are small pieces of cream cheese left, everything will come together when it bakes. Add one cup of the mozzarella cheese and stir until melted.
- Stir in the broccoli and gnocchi. Top with mozzarella and bake on the center rack for 15 minutes, or until the top is bubbly. Sprinkle with red pepper flakes and serve immediately.
**To salt the water we recommend 1 tablespoon to 10 cups of water ratio.
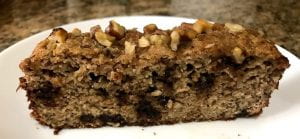
Banana Chocolate Chip Bread made w/ Almond Flour & Greek Yogurt
This has been one of my favorite quarantine comfort recipes. It’s perfect for breakfast or a snack throughout the day. Great for bananas that are ripening too quickly – don’t throw them out! Bake them! Recipe adapted from this site.
Liquid Ingredients:
- 3 ripe bananas, mashed
- 2 eggs, beaten
- 4 tbsp. maple syrup (can substitute with honey)
- 1/2 cup nonfat Greek Yogurt (can substitute with low fat or whole milk yogurt)
Dry Ingredients:
- 2 1/2 cups almond flour (can substitute with other flour)
- 1 tsp. baking soda
- 2 tsp. cinnamon
- 1/4 tsp. nutmeg
- pinch of salt
- 1/4 cup chocolate chips
- 1/2 tbsp. flax seeds
- 1/2 tbsp. chia seeds
Instructions:
- Preheat oven to 350ºF
- Line the loaf pan with butter or cooking spray (I use butter).
- In a large bowl, mash bananas and then whisk in eggs. Stir in maple syrup and yogurt until combined.
- Mix in the almond flour, baking soda, chocolate chips, cinnamon, nutmeg, and salt.
- Pour the batter into a loaf pan and bake for 55 minutes until a toothpick or knife inserted into the center comes out clean. Sometimes I add walnuts on top of the loaf when it has about 15 minutes left in the oven and press them slightly into the loaf.
- When baking is complete, run a knife around the edges of the loaf pan to loosen, and then allow to cool in the pan for about ten minutes.
- Enjoy!
Grilled Pizza!
Thank you for sharing this recipe, Amanda! It even includes homemade pizza dough! ![]() Originally found on allrecipes.com.
Originally found on allrecipes.com.
Ingredients:
- 3 1/2 cups all-purpose flour, or as needed
- 1 envelope Pizza Crust Yeast
- 1 tablespoon sugar
- 1 1/2 teaspoons salt
- 1 1/3 cups very warm water (120 degrees to 130 degrees F)*
- 1/3 cup oil
- pizza sauce
- shredded mozzarella
- other toppings as desired
Directions:
- Start charcoal fire or preheat gas grill to medium-high heat.
- Combine 2 cups flour, undissolved yeast, sugar and salt in a large bowl. Add very warm water and oil; mix until well blended, about 1 minute. Gradually add enough flour to make a soft dough. Dough should form a ball and will be slightly sticky. Knead** on a floured surface, adding additional flour if necessary, until smooth and elastic but not sticky, about 5 minutes.
- Divide dough into 8 portions. Pat or roll dough on a well-floured counter to about 8-inch circles; they do not need to be perfect.
- Brush both sides of crust with additional oil. Using hands, lift each crust carefully and place on grill. Cook for 3 to 4 minutes until bottom is lightly browned and top looks set. Using long handled tongs, remove crust from grill, grilled side up, to a platter or baking sheet.
- Lightly add sauce and top the grilled side of each pizza crust. Excess sauce or toppings makes the pizza hard to handle. Repeat with remaining pizzas.
- Carefully slide each pizza onto the grill. Cook an additional 3 to 4 minutes until bottom of crust is browned and cheese is melted. Remove from grill and serve immediately.
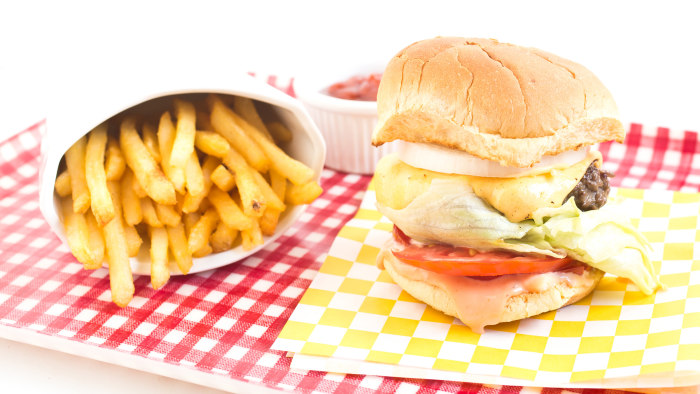
Kick off barbecue season with these burger recipes.
|
In all our patriotic glory, we’re ready to serve up one of our all-time favorite burger recipes. What’s in your best burger recipe? Do you stick to the basics when it comes to your burger or prefer something cuter like this Pokemon burger from Down Under? Or, maybe you like something that bites back? In that case, there’s always the roasted tarantula burger — yes, it’s a real thing! Whatever you fancy when it comes to the best beef (or chorizo, veggie or chicken) burger, these delicious burger recipes will keep guests happy throughout grilling season.
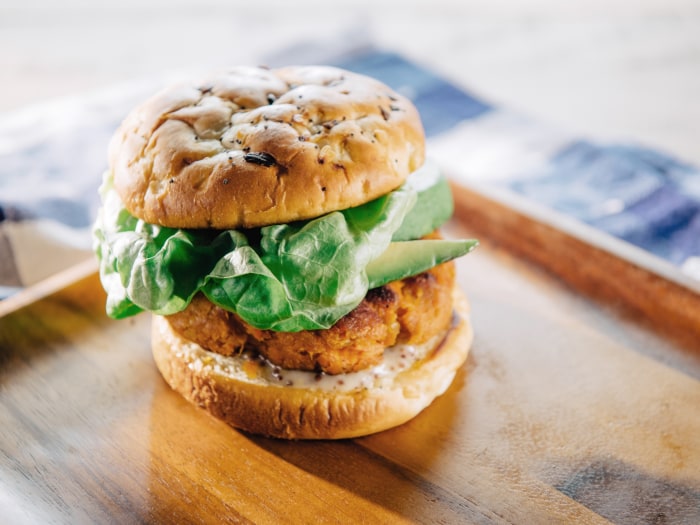
Why not mimic the burger favored by Adam Rippon, Ina Garten and Guy Fieri? This copycat In-N-Out burger is so good, you’ll be going animal style in no time. California-style Burger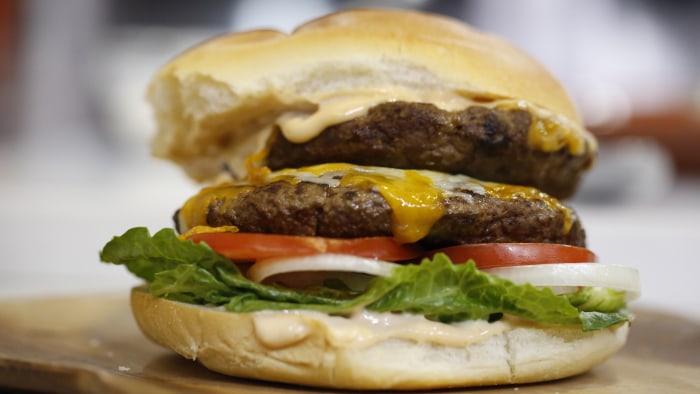 Samantha Okazaki Give your burger a little extra love with a California-style treatment by topping it with Gruyere, cumin and green chile sauce. Cheddar Bacon Ranch Burger Bowls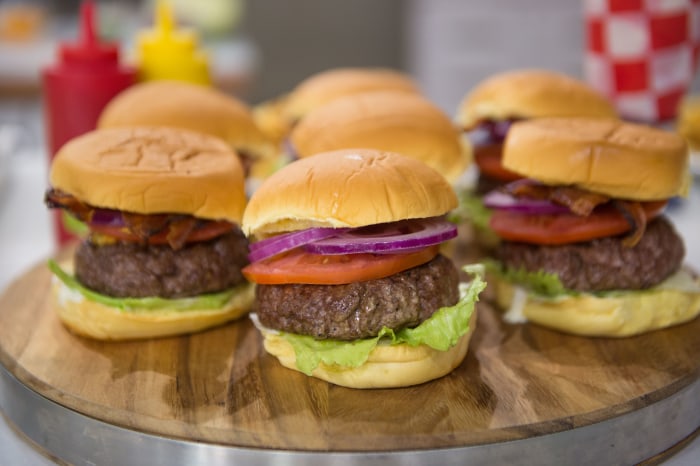 Nathan Congleton Cheddar. Bacon. Ranch. This easy and cheesy burger just may be the American dream. Black Bean Burger with Sweet Hoisin Glaze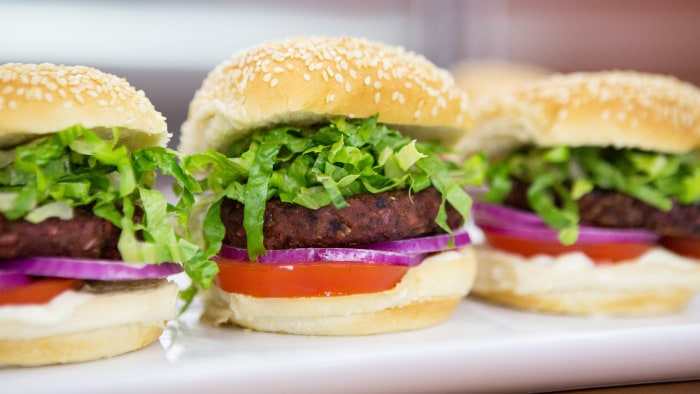 Nathan Congleton Want something lighter yet still flavorful? Try this black bean burger with a hoisin glaze. It’s packed with protein, fiber, iron and many other vital nutrients. Plus, it tastes amazing! Trisha Yearwood’s sweet pea burgers have a garbanzo bean and sweet potato base, and are tasty as they are sweet. She serves them on onion burger buns to balance the sweet with a little savory. Chicken Chorizo Burgers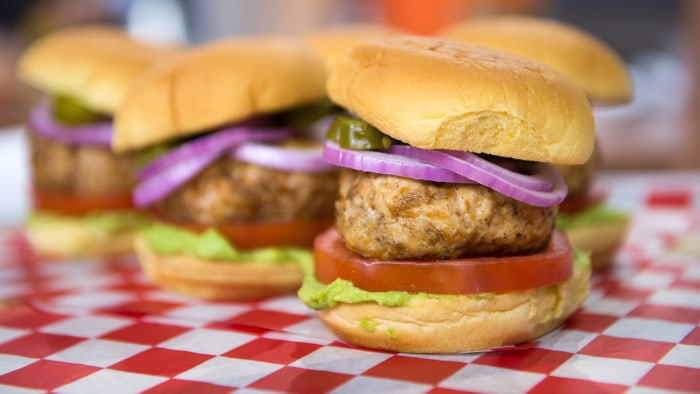 Nathan Congleton This flavor blast of a burger uses ground chicken and chorizo instead of beef. The chorizo keeps the chicken meat extra moist during the grilling process, but you can swap in sweet Italian sausage or ground turkey if you’re prefer a less spicy burger. The Perfect Burger (aka The Crunch Burger)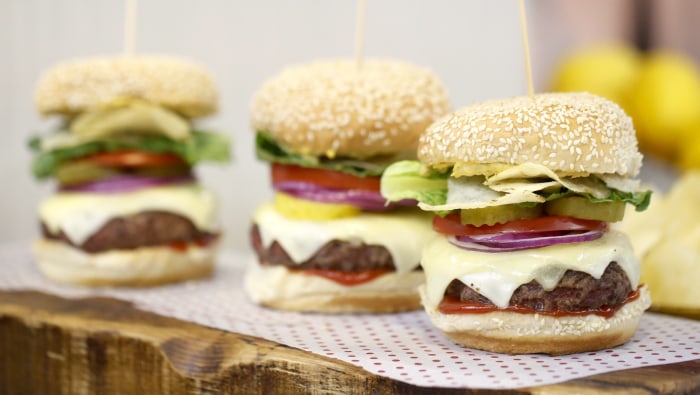 Samantha Okazaki For all the pickle lovers who prefer a crisp sensation over a pickle juice slushy, Bobby Flay’s burger recipe is the one for you. This is the one, the only, the perfect “crunch” burger. Sunny’s Nacho Bacon Burger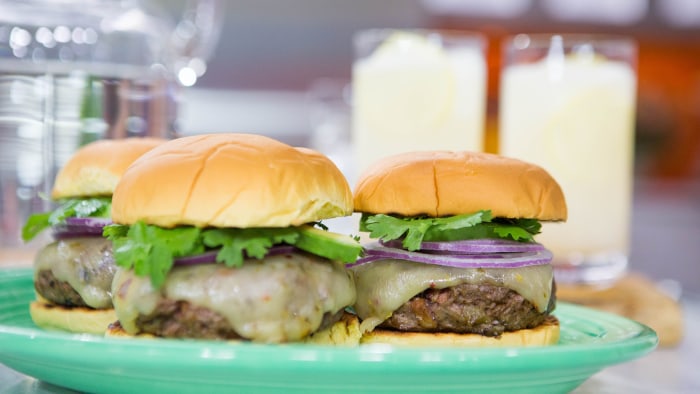 Nathan Congleton The secret to this burger’s over-the-top flavor is in the center. Hiding inside is a molten pocket of gooey nacho cheese dip. It’s a little crazy, and totally delicious. Perfect Bloody Mary Burgers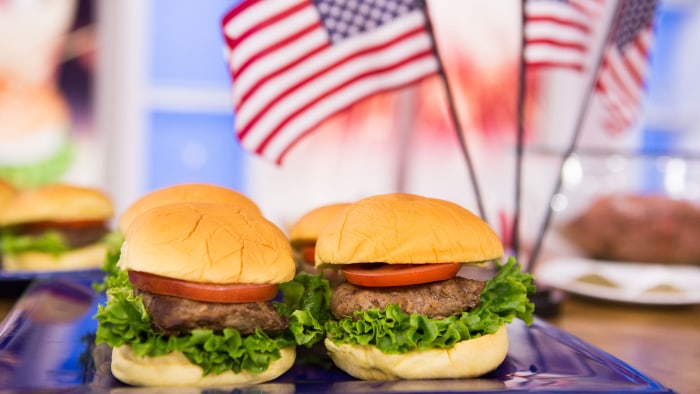 Nathan Congleton Love a good bloody mary? This burger version uses everything from celery seeds to hot sauce to create a savory fix to sink your teeth into. Bacon-Stuffed Turkey Burgers with Grilled Peaches Nathan Congleton This turkey burger takes classic country flavors to the next level. Stuffed with crumbled bacon and topped with pepper jack cheese and grilled peaches, it’s just the right combination of savory, spicy, smoky, sweet and juicy. |
Pity the fool who can’t love pasta fazool
Original Source: https://thetakeout.com/recipe-pasta-fagioli-fazool-1826733332
If you’re like me (from New Jersey with a last name ending in a vowel), you very likely grew up eating “pasta fazool,” long before we found out that it’s actually “pasta fagioli”—technically pasta e fagioli or “pasta and beans.” Neapolitans, who have their own group of dialects, call it “fasule,” hence the Italian-American pronunciation.
Recipes vary from family to family, but, for the most part, they all include three core elements: pasta, white cannellini beans, and a tomato base. It’s hearty, peasant comfort food in its purest form.
Full disclosure: For the first 17 or so years of my life, I didn’t love it. The main reason was I’d always been a pasta-and-red-sauce fiend. I’m pretty sure the first word that came out of my infant mouth was “macaroni,” and I felt that its bean-heavy cousin was a subpar imposter (impasta?) that didn’t really need to be a part of the bi-weekly dinner rotation. For one thing, the presence of the beans lightened the color of the sauce, giving it a pinkish-orange hue—it literally paled in comparison!
For another, the recipe usually called for a lesser, B-list noodle, like ditalini (the micro-tubes) or tiny elbows. I was a fusilli and cavatelli kid. It didn’t help that the pasta was usually overcooked, broken, and generally mush.
I also had weird, inexplicable texture issues with the beans. When I knew it was going to be fazool night, I begged my parents to purée the cannellini in the blender so I didn’t have to see or feel them.
You probably can sense where I’m going with this. My tastes matured, I got over my bean-phobia and I developed a deep nostalgia for the flavors of my youth. While that’s certainly all true, it’s really only half the story. Somehow I managed to reach adulthood without realizing that pasta fagioli is supposed to be a soup. The version I’d grown accustomed to was unnecessarily “dry,” thanks to an over-abundance of macaroni—the noodles absorbed most of the liquid. I learned only recently that this was my dad’s fault. I was over at my parents’ house and my mom was making chicken soup. I asked her why she dumped an entire one-pound box of wagon-wheel pasta in the pot and the conversation kind of went like this:
Mom: That’s the only way your father will eat it.
Me: You mean chicken “soup” with the faint suggestion of broth?
Mom: Don’t start.
(To her credit, it was delicious. I just don’t think you could legally call it soup.) And then there was the question of noodle consistency.
Me: Why are you letting it cook so long? Don’t you want it to be al dente?
Mom: Your father doesn’t like it al dente.
Everything finally made sense. (Love you, Mom and Dad. Never change).
Since then, I’ve fine-tuned my own recipe for pasta fagioli, using my parents’ iteration as a jumping off point—keeping the small, soup-friendly ditalini and elbows—and jazzing it up with more intense flavors (read: exponentially more fresh garlic and a more generous handful of crushed red pepper), color (fresh spinach and/or arugula), and, well, meat (usually pancetta, but sometimes guanciale when I really feel like splurging. If you don’t indulge in the sins of the flesh, I’ve also included a recipe for the vegetarian version below).
The Ciolettis’ original instructions call for a can full of water, but I opt for chicken or vegetable stock.
Finally, the tomatoes make a world of difference. Most of the time I use canned tomatoes, since the window for really good fresh tomatoes is incredibly narrow and I typically crave this dish in the less agriculture-friendly seasons. I absolutely swear by the San Marzano variety because they really are the best plum tomatoes in the world (it has something to do with the volcanic soil in which they grow). Usually a 28-ounce San Marzano can will cost you $2 to $3 more than a comparable container of your average peeled tomatoes, but you will taste the difference. And caveat emptor: If the label says “San Marzano,” it doesn’t necessarily mean it’s the real deal. If the package doesn’t include “D.O.P.” (Denominazione di Origine Protetta, like an AOC), the contents aren’t authentic. Unless you go for the uber-pricey guanciale as your pig meat of choice, the $5 can of tomatoes is likely to be your biggest expense in this easy and economical belly filler.
Cioletti Family’s Improved Pasta Fagioli (Pasta Fazool)
3 Tbsp. olive oil
1 large can (28 oz.) D.O.P. San Marzano tomatoes
6 oz. pancetta, finely chopped (for richer flavor, use guanciale, but it’s pricey)
1/2 pound small, dry pasta (ditalini or elbows)
6-8 cloves of garlic
5 oz. fresh spinach or arugula, or a combination of both
2 cans (15 oz.) of cannellini beans
2 cups chicken stock
Large pinch crushed red pepper flakes
1-2 tsp. salt, plus more for pasta water
2 tsp. oregano (optional)
Grated Pecorino Romano to taste
2-3 quarts water
Chop the pancetta into small cubes (it’s available pre-chopped, if you want to save some time). Cut each garlic clove into quarters—I like big pieces, but feel free to mince or slice if you don’t want chunks. Crush the canned tomatoes in a blender or food processor.
Then, in a medium-size pot, heat the oil for about one minute over medium heat. Add the pancetta and sauté for 3 to 4 minutes or until it shows signs of mild crispiness. Toss in the garlic and stir with the pancetta for another 3 minutes or so, or until it starts to soften and show little bits of brown. Sprinkle in the red pepper flakes and let infuse the oil for about 30 seconds. Add the tomatoes and 1 teaspoon of salt and combine with the ingredients already in the pot. Bring to a simmer, stirring repeatedly.
Pour in the beans, liquid and all and continue stirring. After about a minute, add one bean-can full of chicken stock. Stir again, and after another minute, add the optional oregano. Lower the heat and let cook for about 15 minutes, uncovered. Stir occasionally and keep an eye on the consistency. If the broth/sauce gets too viscous, add more stock, an ounce at a time. Also, check periodically for salt level and add more, to taste.
While the sauce is cooking, fill two-thirds of a medium-size pot with water and bring to a boil. Generously salt the water as it starts to boil. Add the pasta and cook until al dente (see directions on the box) and strain. Return the noodles to the empty pasta pot and turn off the heat under the sauce pot. Scoop about 3 tablespoons of the cooked pasta into the bottom of a bowl, ladle in the sauce/broth and stir together. Grate as much cheese as you desire on top and combine with the rest of the soup.
There’s enough pasta for about four servings, with plenty of broth left over to freeze and reheat for another meal. For a larger party, cook a full pound of the pasta. Do not combine pasta with the leftovers before freezing, unless you want a big, mushy mess.
For a vegetarian version, swap out chicken stock for vegetable stock and omit the meat.
by: Jeff Cioletti
Amanda’s Tasty Chocolate Chip Cookies
Amanda makes the most delicious chocolate chip cookies, and if you’re wondering how she does it, follow the recipe below!
INGREDIENTS:
- 3⁄4 cup white sugar
- 1 cup brown sugar
- 1 cup butter, softened
- 1 tablespoon vanilla
- 2 large eggs, slightly beaten
- 3 cups all-purpose flour
- 3⁄4 teaspoon baking soda
- 3⁄4teaspoon salt
- 3cups semi-sweet chocolate chips
- 1 cup walnuts, chopped or 1 cup pecans
DIRECTIONS:
Amanda’s Special tips:
- Make sure you properly cream your butter with the sugar.
- Refrigerate the dough before you bake the cookies. The cookies stay plump and crunchy on the outside and soft on the inside.
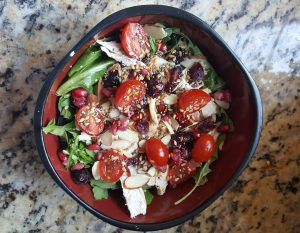
Seedy Salad w/ Honey White Wine Vinaigrette
This salad is easy, delicious, and dairy-free. The seeds give a nice energy boost! First, toss the salad ingredients together. Then, toss the dressing in with the salad.
Salad Ingredients:
- Bed of greens (I usually mix arugula and romaine/spring mix)
- Sliced almonds
- Craisins
- Cherry tomatoes
- Pomegranate seeds, flax seed, and chia seeds
- Roasted Chicken (I use the pre-cooked roasted chickens sold at the grocery store)
Salad Dressing Ingredients:
- White wine vinegar (2 tablespoons)
- Olive oil (1 teaspoon)
- Garlic powder
- Pepper
- Honey (about 1 teaspoon)
Lazy Gal Meal Prep
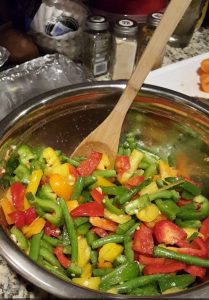
Check out this easy, delicious meal prep that cuts out a lot of cooking time. The main secret: buy a whole roasted chicken from your local grocer instead of cooking the chicken yourself. None of this is measured exactly because, who has time to measure?
Ingredients:
- One roasted, seasoned chicken from your local grocer
- 4-5 sweet peppers (green, yellow, red, orange)
- Large handful of fresh cut green beans
- Your favorite seasonings (I do a lot of garlic and pepper)
- Olive oil
- Rice (proportion your desired amount)
- Optional: pineapple (canned or fresh)
Steps:
- Preheat your oven to 400 degrees
- Toss your chopped peppers and green beans in a large bowl with olive oil and your choices of seasoning
- Once oven is ready, cook vegetables for about 15 minutes. Then broil for a roasted finish for additional 5-7 minutes
- While vegetables are cooking, begin preparing the rice. Season with salt and butter.
- Once vegetables and rice are complete, combine desired amounts into a bowl and add chicken. If you want to add pineapple you can either just add it to the finished product or cook it in the oven with the vegetables.
- Add your choice of sauce: plum sauce, hot sauce, soy sauce, etc.
- Portion out your leftovers to eat for lunch during the week (you can use a mason jar or Tupperware)
- Enjoy!
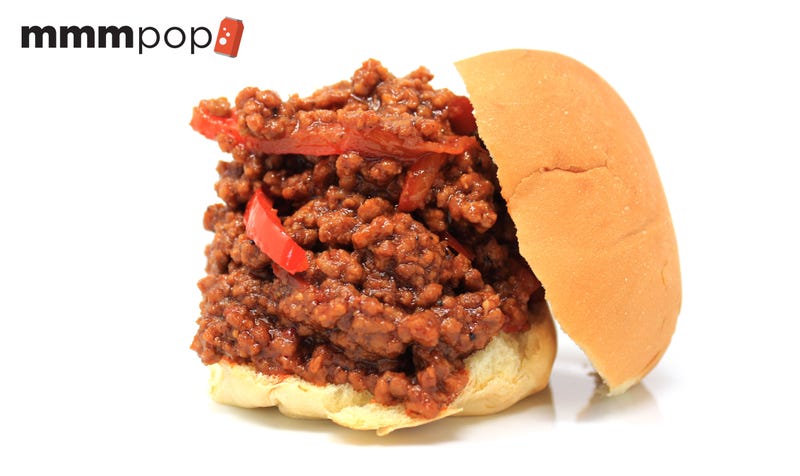
Sweeten your standard sloppy joe recipe with cola
Source: https://www.avclub.com/sweeten-your-standard-sloppy-joe-recipe-with-cola-1818489532
Welcome to MmmPop, our exploration of unexpected ways to use soda pop in recipes.
A colleague of my dad’s—it was either Poz or Ratt or someone he met tending bar in the ’70s, I can’t recall—gave him a sloppy joe recipe that I’ve now been making for over 20 years.
“Just ketchup and Coke?” I remember asking my dad. It sounded like Ratt’s handiwork, in hindsight. I had concurrent thoughts of “you’re pulling my chain, that’s disgusting” and “that sounds easy to make.” When pressed, he just shrugged and confirmed by repeating the two ingredients.
This happened when I was 17, the perfect age to not question the recipe’s plausibility and just run with it. It was easy to remember and cheap to make. Oddly, nobody in my family had made it when I grew up (a red flag if there was ever one), so there was no frame of reference.
But after 20 years of tinkering, adding more ingredients, and a lot of trial and error, I think I’ve nailed it down. The ketchup and cola actually work well together: The caramel flavor of the cola concentrates as it cooks down, and the ketchup’s tomato-onion-garlic savoriness tempers the sweetness. A few extra savory and spicy balancers like mustard and Worcestershire sauce give it character. Using pepper strips instead of diced peppers adds that earthy bell pepper flavor to the beef, but makes it way easier to fish out than those little veggie chunks.
The result is a sloppy joe that puts a canned mix to shame. Of course, this is like saying it’s the best sweatpants you own. It’s not something you’ll pull out when the guests are over, but it’s perfect for something to put on the back of the stove on a weekend afternoon. It’s more Red Roof Inn than Ritz-Carlton, but I sure love it. As do my kids. Thanks, Ratt. (Or Poz—or was it Lack?)
Cola sloppy joe
1 pound ground beef
1 cup ketchup
1 cup cola
1 red pepper
1/2 cup chicken broth
1 tsp. onion powder
2 cloves minced garlic
A few dashes of hot sauce
4-5 dashes of Worcestershire sauce
A one-Mississippi two-Mississippi squirt of yellow mustard
Salt and pepper to taste
Cut the top and bottom off a red pepper, removing the seeds and white flesh. Cut it into thin strands. Mince two cloves of garlic.
In a Dutch oven, sauté ground beef over medium-high heat, adding salt and pepper to taste. Cook until brown, about five minutes. Once browned, pour out much of the rendered fat from the beef (otherwise, your sloppy joes will have a waxy texture). Add onion powder, then the minced garlic, sautéing for another two minutes. Now deglaze the bottom of your pan by adding the half cup of chicken broth (or water). Scrape off that crusty brown stuff—that’s flavor, baby.
Add the red pepper strips and a cup each of cola and ketchup, and simmer at a medium-low heat. After a few minutes, add more black pepper if you’d like, a few shakes of hot sauce, and a few spirals of yellow mustard.
Continue cooking this over medium-low heat for about 30 minutes. Let it hang out there, stirring occasionally, lid off, so it’s still simmering, and reduce until it’s a really thick sauce. Eventually, all the sauce will reduce down, until it ceases to be soupy, and more ground meat enveloped in the sauce.
Taste as you go. It won’t lack sweetness. It may, however, need some salt or vinegar to balance it out—and you may consider adding more mustard, Worcestershire, or hot sauce. Trust your instincts.
Heap high and generous on hamburger buns. Pairs well with potato chips, a cold beverage, and a recital of the Pledge Of Allegiance.


